Purpose:
After adding the device via IP/Domain, you can set the parameters of the device including basic information, time settings, recording schedule, etc.
Note: The remote configuration requires Android 4.2 or higher version.
On the Device Information page, tap ![]() and tap Remote Configuration.
and tap Remote Configuration.
The Remote Configuration page is shown as follows.
Note: The configurable parameters in Remote Configuration vary according to the device type.
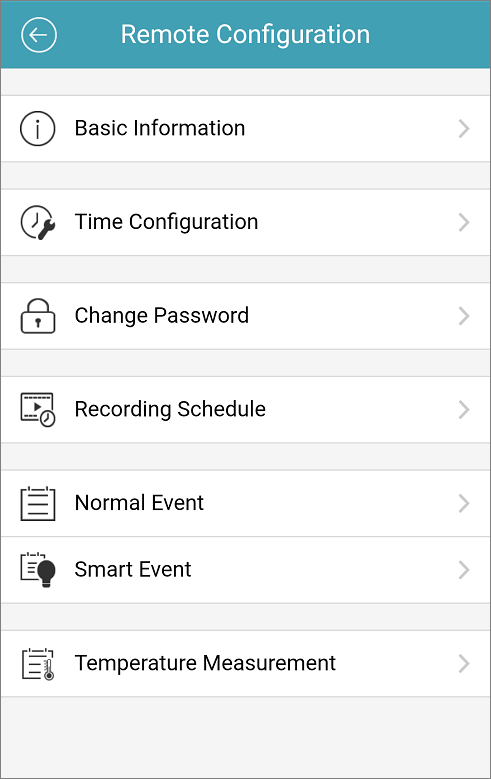
Refer to the following table to view the description of of the remote configuration.
Icon |
Name |
Description |
|
Basic Information |
View basic information of the device such as device name, device No., model, serial No., etc. |
|
Time Configuration |
Select the time zone and set the time synchronization mode. |
|
Change Password |
Change the password of the device. |
|
Recording Schedule |
Set the recording schedule for the channels of the device. |
|
Normal Event |
Enable the normal event such as motion detection, video loss, video tampering detection, etc. |
|
Smart Event |
Enable the smart event such as audio exception detection, face detection, line crossing detection, etc. |
|
Temperature Measurement |
Enable the temperature measurement function for the thermal camera. |
Viewing Basic Information
Purpose:
You can view the basic information of the device such as device name, device No., model, serial No., etc. You can edit the device name and No. as desired.
Steps:
- Tap Basic Information to enter the Basic Information page.
You can view the e device basic parameters including device name, No., model, serial No., version, etc.
- (Optional) Edit the device basic information.
- Tap
 .
. - Edit the device name and device No.
- Tap
 to save the changes.
Setting Time
Purpose:
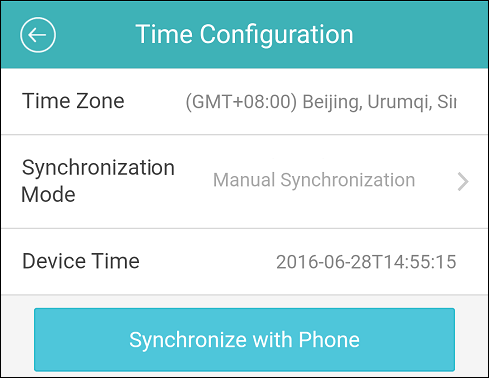
You can select the time zone and set the time synchronization mode as manual or NTP mode.
Steps:
- Tap Time Configuration to enter the Time Configuration page.
- Select the time zone in which the device locates.
- Select the Time Synchronization Mode.
- NTP Synchronization: You are required to set the interval for synchronizing the device time with the NTP server. For setting the NTP server details, see the User Manual of the device.
- Manual Synchronization: You can tap Synchronize with Phone button to synchronize the device time with the system time of the phone.
- Tap
 to save the changes.
The device time will be adjusted automatically.
Changing Device Password
Purpose:
You can change the password of the device.
Steps:
- Tap Change Password to enter the Change Password page.
- Input the old password of the device, and then input the new password and confirm password.
- Tap
 to save the changes.
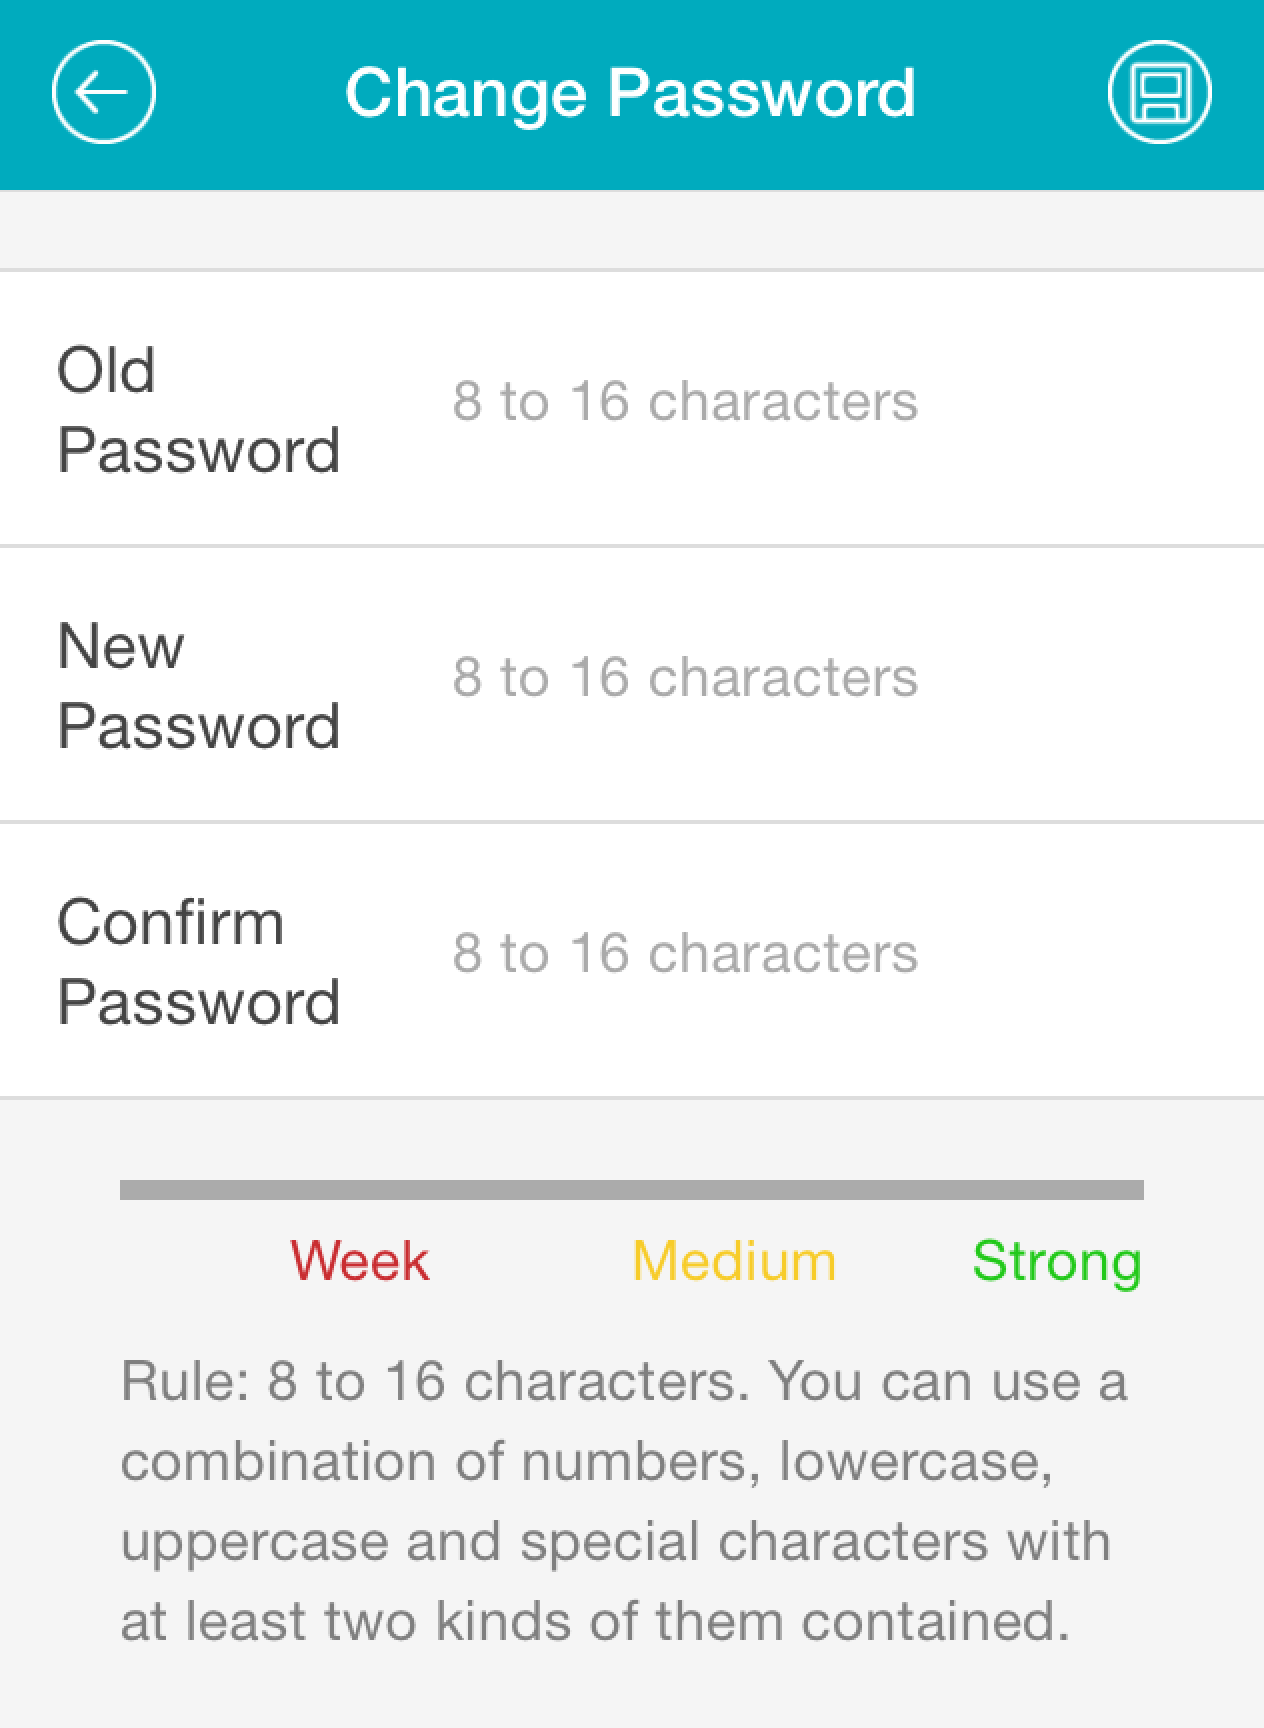
The software will judge password strength automatically, and we highly recommend you to use a strong password to ensure your data security.

Strong Password recommended– We highly recommend you create a strong password of your own choosing (Using a minimum of 8 characters, including at least three of the following categories: upper case letters, lower case letters, numbers, and special characters.) in order to increase the security of your product. And we recommend you reset your password regularly, especially in the high security system, resetting the password monthly or weekly can better protect your product.
Setting Recording Schedule
Purpose:
You can set the recording schedule for the channels of the device.
Steps:
- Tap Recording Schedule to enter the Recording Schedule page.
- Switch the
 to set it as
  to enable the recording schedule of the channel.
 - Tap the day in a week to set the schedule in the following page.
- Tap the time period to set the recording type, start time, and end time.
- Continuous: The video will be recorded automatically according to the time of the schedule.
- Motion Detection: The video will be recorded when the motion is detected.
- Alarm: The video will be recorded when the alarm is triggered via the external alarm input channels.
- Motion Detection or Alarm: The video will be recorded when the external alarm is triggered or the motion is detected.
- Motion Detection and Alarm: The video will be recorded when the motion and alarm are triggered at the same time.
- Event: The video will be recorded when any event is detected.
Note: You can also set the recording type as detailed event type, which should be supported by the device. For details, see the User Manual of the device.
- Tap OK to save the settings of the time period on Monday.
- Perform step 1) to 2) to set other time periods on Monday.
- (Optional) You can tap Copy to to copy all the time periods settings on Monday to the other dates.
- Tap
 to save the settings.
If the device has multiple channels, you can select the channel to set the recording schedule.
Note: Up to eight time periods can be configured in one day’s schedule. And the time periods cannot be overlapped with each other.
Here we take Monday as an example.
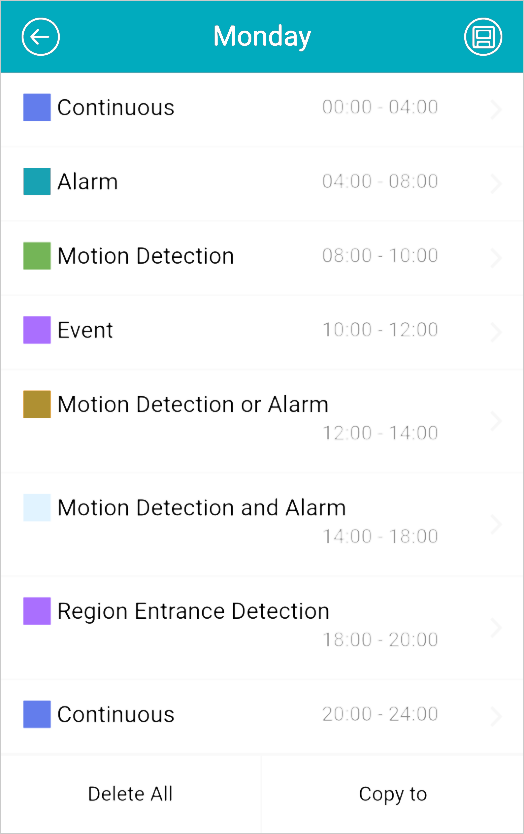
You can tap Delete All to clear all the configured time periods on Monday.
Setting Normal Event
Purpose:
You can enable the normal event such as motion detection, video tampering alarm, video loss alarm, for the channels of the device.
Note: The supported event types of Normal Event vary according to different devices.Steps:
- Tap Normal Event to enter the Normal Event page.
- Switch
 to
to  to enable the function of normal event.
If the device has multiple channels, you can select the channel according to actual needs.
Setting Smart Event
Purpose:
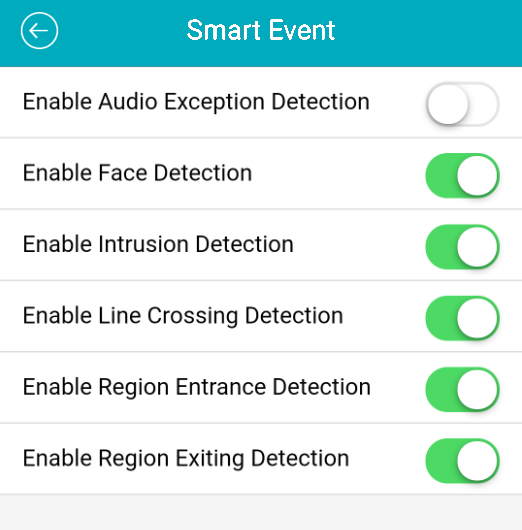
You can enable the smart event which is supported by the mobile client, such as audio exception detection, face detection, intrusion detection, etc., for the channels of the device.
Note: The supported event types of Smart Event vary according to different devices.Steps:
- Tap Smart Event to enter the Smart Event page.
- Switch
 to
to  to enable the function of smart event.
If the device has multiple channels, you can select the channel according to actual needs.
Measuring Temperature
Purpose:
You can enable the temperature measurement function for the thermal camera.
Note: This function is only available for the thermal camera.
Steps:
- Tap Temperature Measurement to enter the Temperature Measurement page.
- Switch
 to
to  to enable the function of smart event.
If the device has multiple channels, you can select the channel according to actual needs.